Have you ever photographed a landscape and when you viewed the finished picture said, “This doesn’t really capture the range and depth of what I saw”? Well, I have a pretty good idea why and what you can do about it.
A human can see roughly 130 degrees with one eye. When combined with the vision of the other eye, a mental image covering 180 degrees is produced, giving us a three-dimensional picture that has both range and depth.
On the other hand, a camera equipped with a normal lens only gives you a two-dimensional image with far less than 180 degrees. You just don’t get the same range and depth that you see with your eyes.
I have been experimenting with panoramic images for a couple of years and I feel like I am able to produce an image that is much closer to what the human eye actually sees. I do this by taking sequential pictures of a landscape scene and overlapping between each image. I usually start on the left side of the landscape and rotate myself and the camera to the right with each subsequent picture. It’s important to leave some overlap between each shot so that the software knows how to merge the images. The camera needs to be panned reasonably level but doesn’t need to be on a tripod. The camera can be held in either a horizontal or vertical orientation. The multiple image files are then “stitched” together using artificial intelligence software.
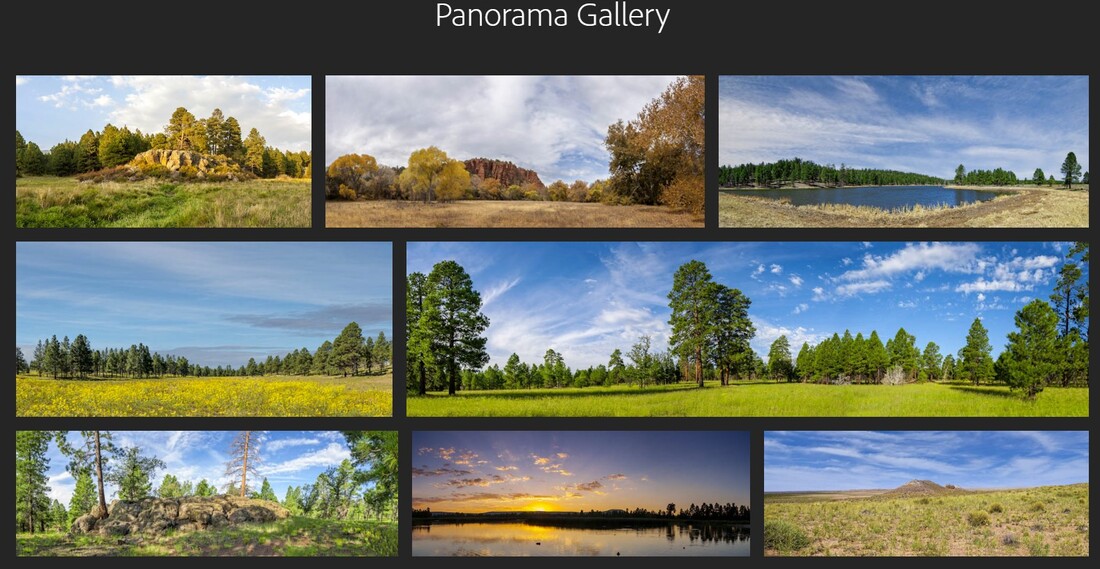
This gallery contains some of my favorite Panorama images that are available as downloads and fine art prints. To view the gallery, click here or on the photo collage above. When you are in the gallery, click on a thumbnail to enlarge an image. To navigate the images click on the arrows. To see the captions click on the (i) symbol.
The Anatomy of a Panoramic Image
These pictures were photographed at Little Painted Desert County Park north of Winslow, Arizona. This location is one of very few places where you can access Northern Arizona's Painted Desert.
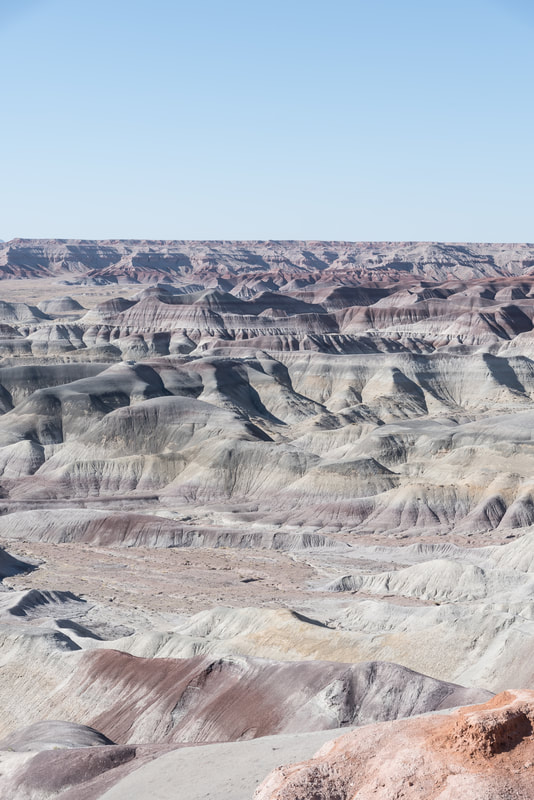
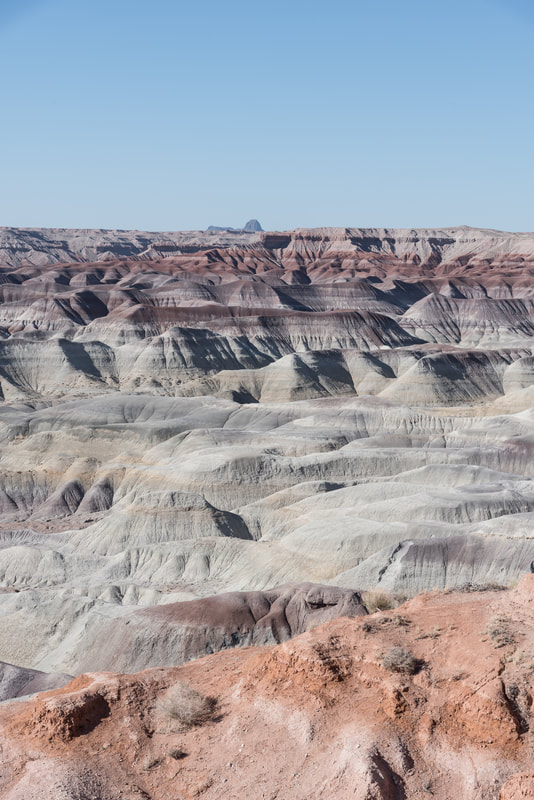
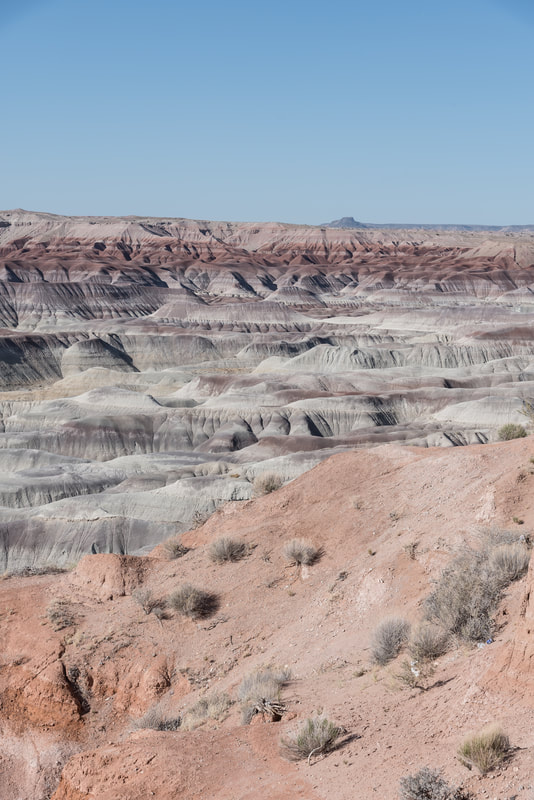
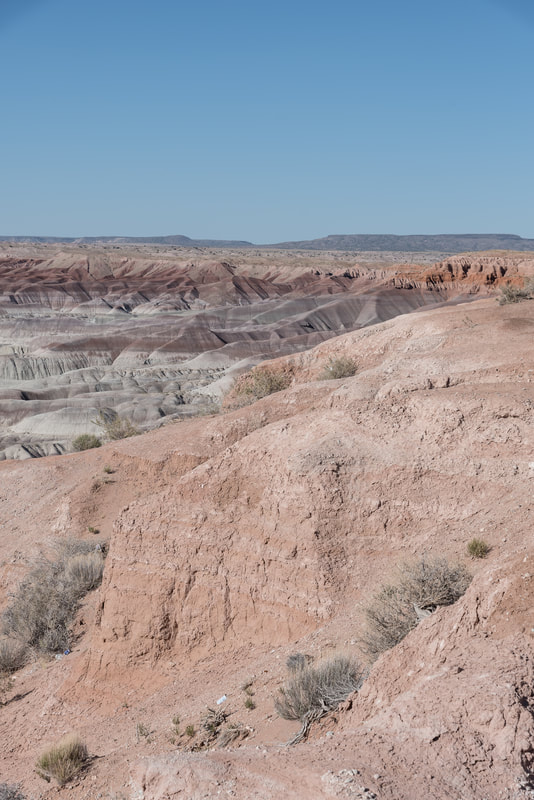
Step 1: Take a series of pictures.
Here are the original four images photographed with the camera hand held in a vertical orientation.
The camera was a Nikon D750 with a 24-120 Lens set at 70mm.
The exposure was set at f11 and ISO 100 with aperture priority.
The shutter speed varied between 1/60 sec and 1/400 sec.
Here are the original four images photographed with the camera hand held in a vertical orientation.
The camera was a Nikon D750 with a 24-120 Lens set at 70mm.
The exposure was set at f11 and ISO 100 with aperture priority.
The shutter speed varied between 1/60 sec and 1/400 sec.
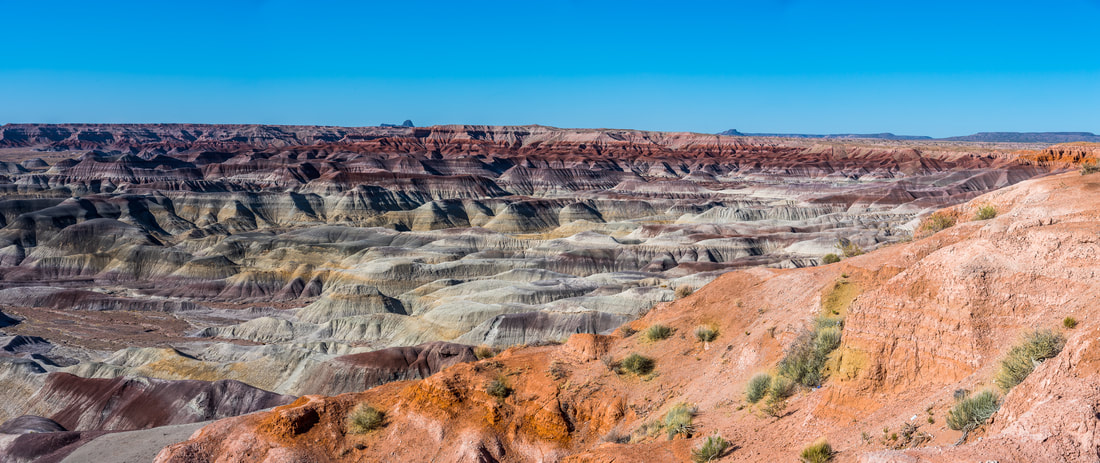
Step 2: Merge the four images and create a panoramic picture.
The panorama was created using the panorama photo merge feature in Adobe Lightroom Classic.
The color and exposure are automatically adjusted during the merge process.
Note the clear blue sky and crooked horizon line. These will be addressed in the next step.
The panorama was created using the panorama photo merge feature in Adobe Lightroom Classic.
The color and exposure are automatically adjusted during the merge process.
Note the clear blue sky and crooked horizon line. These will be addressed in the next step.
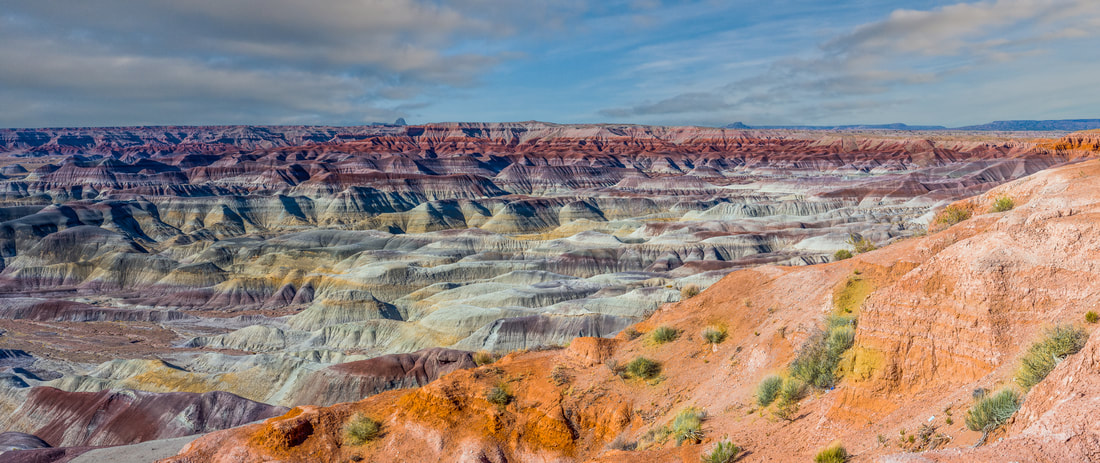
Step 3: Enhance the finished image.
Photoshop was used to replace the clear blue sky with a more dramatic cloudscape.
The final image was sent back to Lightroom Classic and the horizon line was straightened
using the crop tool.
Photoshop was used to replace the clear blue sky with a more dramatic cloudscape.
The final image was sent back to Lightroom Classic and the horizon line was straightened
using the crop tool.